The WeTab is a MeeGo tablet from Munich based 4tiitoo AG. The tablet’s hardware is similar to the ExoPC MeeGo tablet that I got at an Intel developer event recently. Both tablets are manufactured by Pegatron, a division of ASUS. The only hardware differences are that the WeTab has less RAM (1GB vs 2GB) and a smaller solid state drive (choice of 16 GB or 32 GB vs 64 GB) and the fact that the WeTab can optionally have a 3G radio and GPS.
I’ve been running up against some of the pre-alpha limitations of the official MeeGo project tablet release. I was eager to try the WeTab OS which can run on the ExoPC and supposedly provides a more polished, consumer oriented experience.
Installing the WeTab OS on the ExoPC turned out to be easy thanks to a handy guide (with video) that I found at Maemo/MeeGo guru zehjotkah’s site meetmeego.org. The process is similar to updating to a new MeeGo build on the ExoPC :
- Go to wetab.mobi/developers/downloads-and-howtos/ and download the WeTab OS Recovery USB Boot image, which is a BitTorrent link. The Torrent will create a folder with two files. One is a checksum file the other, a 984 MB file named WeTab-recovery-29102010.usbimg, is the actual image.
- Create a bootable USB drive by byte copying the image to a thumb drive. I’m a Ubuntu user so these instructions are Linux specific. Windows users can create a bootable USB image by following steps 1-4 of the instructions at http://appdeveloper.intel.com/en-us/article/installing-meego-tablet-os. Come back here after you have the image on the thumb drive as the rest of those instructions are for the MeeGo netbook edition.
- Download Image Writer to the same directory where you saved the .img file. Image Writer requires Python >=2.4. It’s a script that safely writes the image to your USB drive and has safeguards against overwriting your system drive. If you know what you are doing you can also use dd.
- Open a terminal and:
cd <directory with .img and image-writer files>
chmod a+x ./image-writer
sudo ./image-writer <image file name>
- It will take a couple of minutes to write the image to the drive.
- Power down the ExoPC and plug the thumb-drive into one of the two USB slots on the left side. Plug a USB keyboard into the other USB slot. You must have a keyboard to install the WeTab OS.
- Start up the tablet and immediately tap (with your finger) the “BBS” button that appears briefly in the top right corner of the screen. Select your USB thumb-drive as the drive to boot from by tapping its name.
- When the WeTab Recovery System boots up you will see a screen labeled “Recovery Process” in English and German.
- Ignore the instructions on that screen and press Ctrl-Alt-F3 on the keyboard to bring up a terminal.
- Log in with username “root” and password “wetab”
- type the following and press Enter:
tiitoo-installer.sh silent_installer /mnt/live/system.tar.bz2
- After a while (10 minutes or more) the “#” shell prompt will re-appear. When it does type: reboot and press Enter.
- When WeTab reboots it will prompt you to set up a WiFi connection and create an online WeTab account. Creating an account is mandatory, you won’t be able to use the WeTab OS without it.
The first time I tried activating the WeTab activation server was down and the activation failed with a message that it couldn’t connect to the server. The server was down for about 12 hours. I don’t know how often that happens but if activation fails, don’t panic just try again latter. The server is only needed for activation and once activated WeTab is fully functional without it.
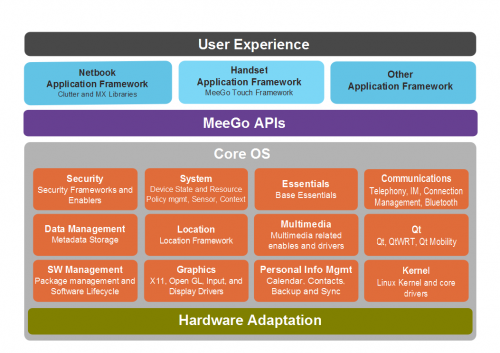
I was pretty impressed with the WeTab OS which combines the MeeGo core OS and API layers with a custom application framework and user interface. It’s fast, attractive and highly usable.
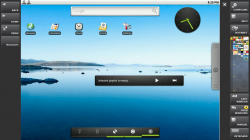
The WeTab home screen holds rectangular widgets which can be app launchers or Internet shortcuts or can hold interactive content like the Bing maps widget that comes with the WeTab (image top). You can rearrange the widgets and delete ones you don’t need. There’s a permanent sidebar on the right that provides instant access to the home screen, touch keyboard, the Web browser and important settings.
Apps created or customized for WebTab create a second sidebar on the left containing their controls and menus. Custom apps bundled with the OS include a Calendar, File Browser, Contacts, Media Gallery, Video Player, Camera, Chrome based browser and customized versions of the Claws Email app and FBReader eBook reader (image above right). A vanilla copy of Open Office is also preinstalled.
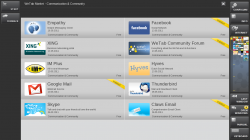
The best thing about the Wetab is that you aren’t limited to WeTab or MeeGo apps. The WeTap Market (image above, left) contains dozens of apps most of which are mainly unmodified versions of popular Linux apps like the Gedit text editor, Gimp image editor and Thunar file browser.
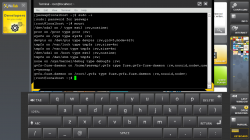
Apps run in movable re-sizable windows and use the very nice touch keyboard (image above right) which appears automatically when tapping a text field in most apps and can be opened manually by tapping a button in the sidebar. The keyboard isn’t re-sizable but can be dragged anywhere on the screen so that you can always see what you are typing. There are four keyboards in all containing all sorts of special characters, arrow keys and cut, copy, paste, undo and redo keys that work in most apps.
You can also install many Linux apps that that are distributed as RPM files. First install the “Root Terminal” from the WeTab Market. Then download the app you want to install, open the terminal (image above, left) and:
cd ~/Downloads
sudo rpm -1 <App Name>
First I installed Opera Mobile 11 from labs.opera.com/news/2011/03/22/. It’s touch friendly and features the ability to save pages for offline reading, FTP:// support and bookmark backup and sync, all of which the WeTab browser lacks, but doesn’t do Flash.
cd ~/Downloads
sudo rpm -i Opera_Mobile-WeTab-11.00-86.i386.rpm
The WeTab browser is Chrome based, nicely touch optimized, supports Flash and works well, but it doesn’t support Chrome extensions or sync. So I also installed Chrome 11. Here’s how:
Download the “32 bit .rpm (For Fedora/openSUSE)” from http://www.google.com/chrome using the WeTab browser. Chrome requires the lsb (Linux Standard Base) library. To install it open the terminal and type:
sudo yum install meego-lsb.i586
Then install Chrome:
cd ~/Downloads
sudo rpm -i google-chrome-stable_current_i386.rpm
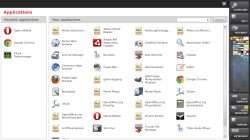
Generic apps like Chrome 11 don’t have launcher widgets on the WeTab home screen. You launch them from the App Launcher app (image, above right). The new Angry Birds Webapp (image below, left) runs in Chrome 11 on the Tablet. It’s a little on the slow side but definitely playable.
Apps like Chrome, Gimp and Open Office aren’t touch optimized but I didn’t have much trouble using them on the WeTab. The large screen makes it reasonably easy to hit menu pads and small buttons. A few tips:
- You can simulate a right click by doing a long press and then lifting your finger. The context menu doesn’t appear until you lift your finger.
- If you use Chrome 11, install the Chrome Touch extension which lets you scroll pages by dragging.
- There’s a recent version of Firefox in the WeTab Market that works well. Install the Grab and Drag extension to make it more touch friendly.
The WeTab can run Android apps too. There’s an Android Starter app in the WeTab Market that runs the AOSP version of Android 2.1 in a windowed VM (image below, right). It works, but is rather slow especially responding to touch events and I found it frustrating to use.
I really like the WeTab OS. It’s the first x586 Linux/X-Windows distro I tried that’s fully usable on a touch screen. And it’s attractive, intuitive and stable. It doesn’t intimidate non-technical users, yet power users have the full power of Linux apps and the shell just a tap or two away. A very impressive accomplishment by a small company.
For now I’m using WeTab as the main OS on my tablet. I’ve set it up to double boot into the MeGo Tablet OS so I can the track the progress of that project and report bugs, but for getting work done WeTab OS is the one I’ll be using.



Very nice!
https://plus.google.com/109332751123105129547
Dennis,
I am currently downloading the WeTab usbimg and going to see which is the easiest way to get a dual partition/boot on the ExoPC. It’s been a while that I have used Linux/UNIX, but it is slowly coming back to me now.
Thanks for the great ExoPC/Meego/WeTab articles.
Jim
Here’s what I did to dual boot MeeGo and WeTab. I Installed WeTab first as its install will delete any existing partitions then I:
1. Created a gParted Live bootable USB (see: http://gparted.sourceforge.net/liveusb.php)
2. Resized the WeTab root partition (the largest one) to 10 GB
3. Created an Extended partition sda4 in the new unallocated space created by step 2.
4. Created a 200 MB ext3 Logical partition sda5 (for MeeGo /boot) and a 10 GB ext3 Logical partition sda6 (for MeeGo /) inside the Extended
partition
5. Installed MeeGo Tablet as described here:
http://blog.wapreview.com/10130/ except that I choose the Custom partition option instead of the Default one and told MeeGo to use sda5 as /boot and sda6 as / and to format sda5 as ext3 and sda6 as btfrs (Meego install seems to fail if you don’t let it format /boot and MeeGo recommends btfrs for /)
6. Rebooted the tablet, it will go into MeeGo with no option to boot WeTab. To fix that:
Start MeeGo terminal and do:
su
password: meego
nano /boot/extlinux/extlinux.conf
Using the nano editor edit /boot/extlinux/extlinux.conf as follows:
a: change timeout to 100 (10 seconds)
b: comment out the line: menu hidden
c: add a WeTab boot menu entry:
label sda1
menu label WeTab
kernel chain.c32
append boot 1
When uou’re done extlinux should look similar to this:
# extlinux.conf generated by anaconda
prompt 0
timeout 100
default vesamenu.c32
menu autoboot Starting MeeGo…
#menu hidden
menu resolution 1366 768
menu background splash.jpg
menu title Welcome to MeeGo!
menu color border 0 #ffffffff #00000000
menu color sel 7 #ffffffff #ff000000
menu color title 0 #ffffffff #00000000
menu color tabmsg 0 #ffffffff #00000000
menu color unsel 0 #ffffffff #00000000
menu color hotsel 0 #ff000000 #ffffffff
menu color hotkey 7 #ffffffff #ff000000
menu color timeout_msg 0 #ffffffff #00000000
menu color timeout 0 #ffffffff #00000000
menu color cmdline 0 #ffffffff #00000000
label meego
menu label MeeGo (2.6.38.2-8.12-adaptation-pinetrail)
kernel vmlinuz-2.6.38.2-8.12-adaptation-pinetrail
append ro root=/dev/sda8 quiet vga=current
menu default
label sda1
menu label WeTab
kernel chain.c32
append boot 1
This will give you a boot menu at start up letting you choose WeTab or MeeGo. I also installed Ubuntu as a third bootable OS. It’s easiest to install Ubuntu last as it will aytomatically create a grub boot menu letting you pick any of the OSs